Hello world!

It has been a long time since I posted. So I thought it is good to start with some roses to restart my blog.

I have become a big fan of bare root roses as my daughter presented me 3 fragrant repeat blooming roses in 2018. The grew, bloomed and spread its fragrance all through summer.

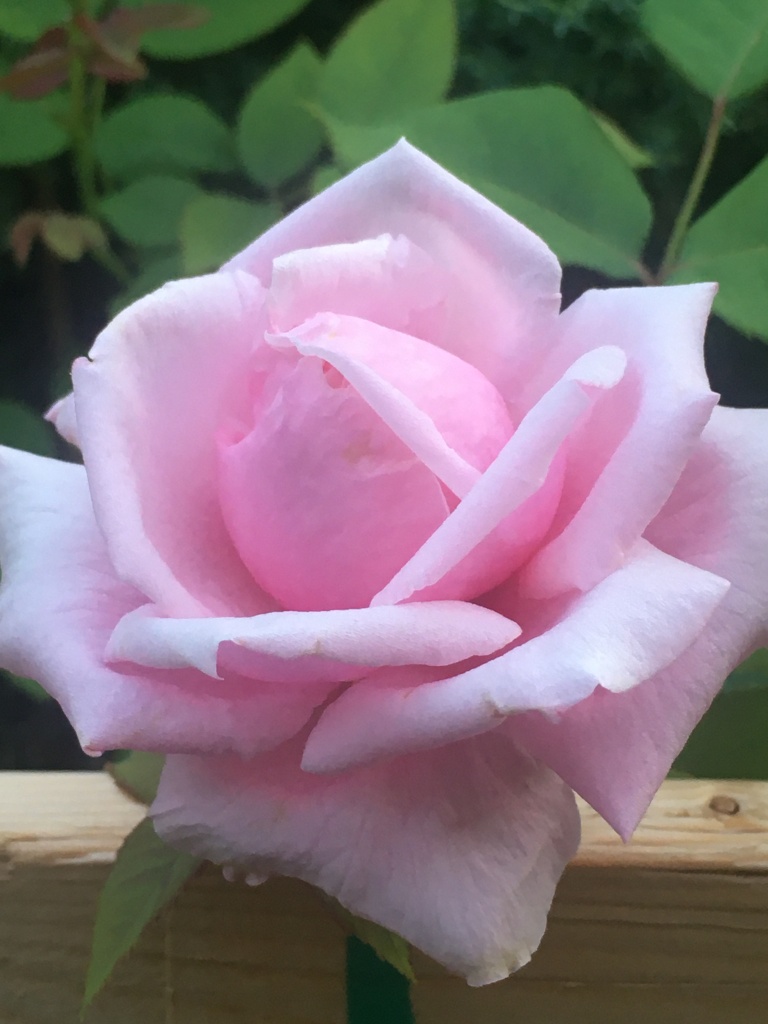
They are floribunda roses, called Earth Angel perfuma, another a pink Chartreuse de parme and a light pink Nahema all with heady perfume and showy flowers.

Earth Angel is a white rose that has a pink tint in its center. It had about 60 buds this year and a record for that shrub. Most of them blossomed except a few which were munched by olive green worms. This rose is very fragrant with a mixed scent of apple, elderberries, and lemon. It blooms repeatedly so I have about 16 new buds that are starting the next round. I love this rose for its bouquet of flowers and heavy scent.

Earth Angel

Earth Angel – cup shaped flower

Chartreuse de Parme is a lilac pink rose with great fragrance. Its double layer of petals and heavy scent make it the ideal rose for cut flowers. It grew big and strong and had 36 blooms and another round of 18 buds. It has a pleasant citrus and tangerine fragrance.

This image has an empty alt attribute; its file name is img_5144.jpg
Chartreuse de Parme
Charteuse de Parma

Nahema is a climbing rose and has fragrant light pink blooms. It is a repeat bloomer but I had some suckers developing at the base and when removed the plant suffered. So its growth was not as expected in its 3rd year in my yard. It had six flowers this year and is producing new buds.

Nahema

Kiss me Kate is another climbing rose. It grows on the other side of the arbor to match with Nahema so I chose a pink fragrant rose. I planted it this year and it grew well from bare roots. It was slow to grow as it had some shade around it and had only two flowers as there was a worm attack. Now it is well-rooted and the growth is vigorous with 3 more buds.

Kiss Me Kate

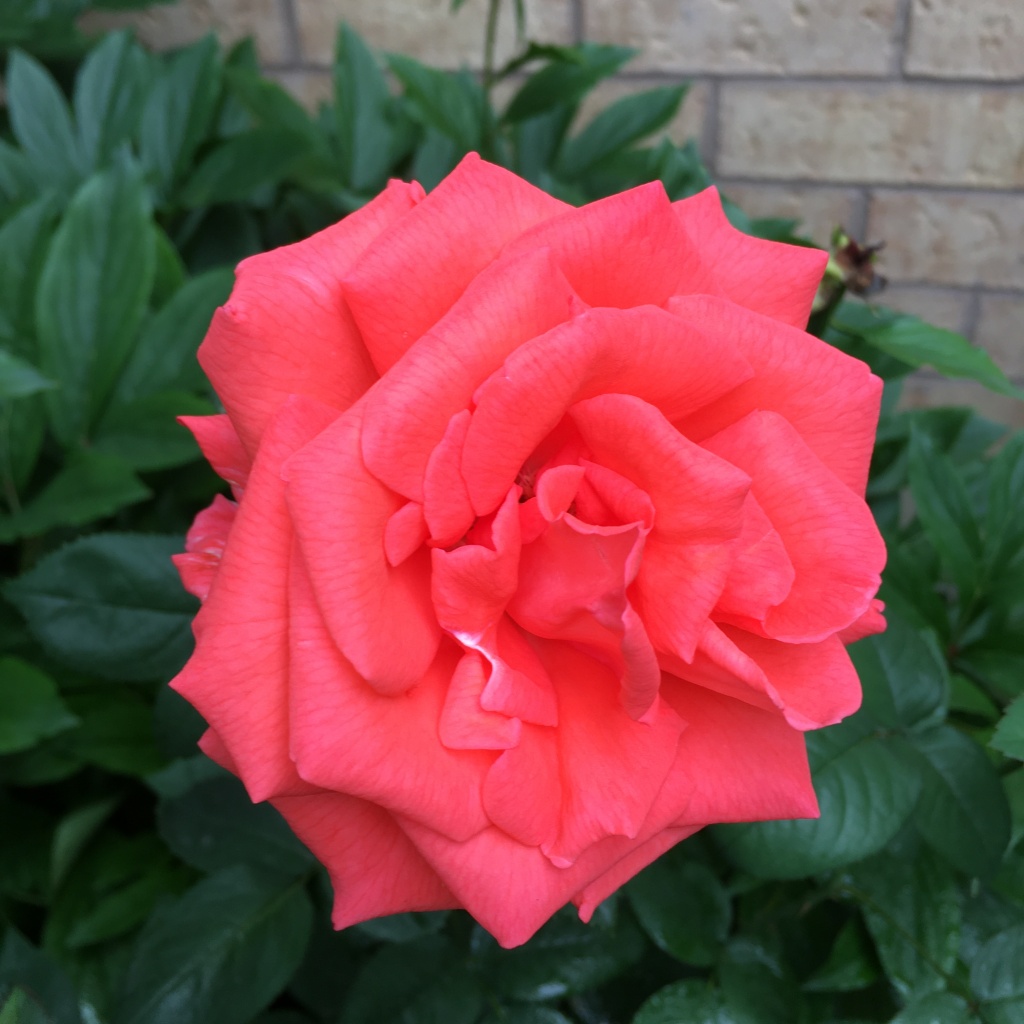
Hybrid tea roses are a pleasure to look at and they make great cut flowers. I have two of them, an orange called – Tropicana and a pink called Pristine. They have upright canes rather than a bushy growth and carry large flowers.

Hybrid tea orange rose – Tropicana
Hybrid Pink – Pristine

Miniature floribunda roses are also called patio roses. These have cute little flowers with a mild scent. I got 2 small pots from the store, one red and one yellow with a lot of flowers. When I tried to plant them I found 3 roses in each pot. Planted them separately and had glorious flowering in 6 spots. They are blooming repeatedly.

Miniature red rose
Miniature yellow planted in a pot

I use compost, coffee ground and broken egg shells and water them lavishly. Summer is dull without these beauties blooming and I am waiting for new blooms in the following days. Enjoy these flowers!

Posted in Photos, Uncategorized | 2 Comments

Aquafaba sponge cake/Fluffy sponge cake

I have been a bit busy recently and was pushing aside this post for a long time. I had a domestic issue to tackle. Now, the situation is under control. I have also taken up a full-time job which is consuming most of my time. My apologies for not letting you know about it. Thank you for visiting my site and I will visit everyone and get back to normal blogging soon.

This is a post that brings the result of my aquafaba cake test. I wanted a recipe to try, that uses many eggs so I could substitute them with aquafaba. I chose to try making a sponge cake as that is a challenging recipe! It turned out to be a wonderful cake. I used the beany liquid twice, firstly as an egg substitute in the cake recipe and then to make the icing for the cake.

IMG_4818The recipe is very simple with basic ingredients. I used a springfoam pan and lined it with parchment paper to prevent it from sticking to the bottom and sides of the pan. I waited with pounding heart wishing it to bake well.

Ingredients

  • 1/2 cup chickpea liquid
  • 3/4 cup sugar
  • 3/4 cup all-purpose flour
  • 1 tsp vanilla
  1. Beat chick pea liquid with an electric beater to become frothy.
  2. Add sugar and beat for 4 minutes until it turns creamy with a ribbon like consistency.(When you lift the beater it leaves ribbon like strips of batter.)
  3. Then, add vanilla extract and continue beating till it reaches almost stiff peaks.
  4. Pre-heat over to 350° F.
  5. Cover the bottom and sides of a 7″ springform pan with parchment paper. (I buttered the paper for quick release.)
  6. Sift all-purpose flour and add to the beaten mix.
  7. Fold in the flour gently without over mixing.
  8. Pour it into baking pan and level the top.
  9. Bake in the center of the preheated oven for 20 minutes or until tester comes out clean.
  10. Remove pan from oven and cool on a rack.
  11. When it is warm to touch release the bottom of the pan.
  12. Gently unwrap paper from the side and allow it to cool completely.
  13. Cool completely before icing it for a tasty treat.
  14. Alternatively, store in the fridge and decorate it the next day.

eggless sponge cake

sponge cake

It was a very spongy cake.


cake

This is the bottom of the cake.

s cake

Icing

  • 1 cup aquafaba
  • 1/4 cup sugar
  • 1/2 tsp vanilla

Beat the bean liquid with sugar to form stiff peaks and add vanilla extract. Spread icing on the cake after cutting it into smaller pieces. I decorated it with chocolate slices, mint and raspberries.

cThis cake was very spongy, a bit sticky and very sweet. The mix was thick like a meringue and the top of the cake became a bit hard and formed a crust. While baking keep a close watch and bake till the top starts browning.

At the end of the baking session, I realized that a few modification could help improve this cake. I would reduce the amount of sugar next time. The center of the cake caved in as it cooled. Maybe, that could be due to the excess sugar.

I stored this cake in the fridge for a week. This cake freezes well and can be used after packing it tightly in foil.  There is actually no need for icing but I wanted to try to use aquafaba in icing and so tried it.

I have decided not to waste the liquid from my bean cans any more as I have found this great vegan substitute for eggs.

Try this to enjoy a simple vegan cake.

Posted in Baked, Cake, Cake decoration, comfort food, Dessert, Easy recipe, Finger food, International recipe, Not just for kids, Snack, Vegan, Vegetarian | Tagged , , , , , , , | 39 Comments

Sunday Funday#14

I had a look at Anna’s photos of Maui and it rekindled memories of my trip. Last year, we stayed for a week in Maui and tried some activities to spend the time. The best experience was a helicopter tour to have an aerial view of Maui and the neighboring islands. These pictures are old but the thrill is very fresh in my mind.

Maui helicopterRocky landscape jutting into the blueMauiMaui oceanI was grabbing everything around me to cling on to dear life as the helicopter went straight towards that cascading waterfall. It flew a complete circle so all the 6 passengers could get a good scare.Maui waterfall Beach side hotelsMaui landscapeThe most picturesque highway.Maui highway Maui windmillNo wonder Hawaii is called the rainbow state!Maui rainbowI was in the cockpit with the pilot. This is the only flight where you will be allowed to sit next to the pilot.helicopter cockpitMeeting of land, sea and skyland, sea, skyInk black rain clouds!clouds We have a long weekend, including Monday, so I am posting this and going for a road trip.

Posted in Photos | Tagged , , | 8 Comments

Sunday Funday # 13

Humming bird is the most interesting little creature to watch. I have the pleasure of watching a pair from my window facing the backyard. They have a regular rendezvous with the hibiscus flowers every morning, drinking its nectar. There is a tinted film on the window and they cannot see us watching them. These birds can see the reflection of flowers on it and at times come straight towards the window. It is like watching a Humming bird show on TV.

It is so small, the size of a thumb and very cute. It is highly energetic and sugar powered! I was surprised to know that they can live 3-5 years. humming bird Humming birds make a humming sound when their wings beat in a flapping motion at high frequencies.

Caught in flight!humming bird in flightIt was difficult to focus on the bird as it was always in motion flapping its wings.humming bird flyingA hummingbird drinks with its tongue. Its long tongue darts out into a flower and feeds on nectar. humming bird tonguehumming bird I wish those Hibiscus flowers continue to bloom for these beautiful birds. It is very selective and are spotted usually around this time of the year!

Posted in Photos | Tagged , , , , | 16 Comments

Aquafaba mayonnaise/ Eggless mayonnaise

Have you heard of Aquafaba? I am sure you have some idea about this egg substitute that awed the vegan community. A couple of months ago, I read about this in a post by Poppy of http://bunnykitchen.com and I was fascinated by it. I recently, had a sudden urge to try it.

mayoAquafaba is the briny liquid found in a can of beans. It is the viscous liquid surrounding the beans and the thing you discard before using beans. We ignorantly poured that precious liquid down the drain not realizing its extensive use. Now, there is good news for that slimy water. It works as a binder, leavening agent and emulsifier, exactly like egg whites. It can be whipped up into a fluff to make all kinds of amazing things, from meringues, marshmallows to cakes. Oh my, who would have thought! I would call it an incredible discovery!

Vegan mayonnaise on bread The idea that the juice of legumes in a can has all the protein and performance of an egg is tantalizing and hard to believe. It started working and emerged as a meringue craze. Thanks to French chef Joël Roessel who experimented with it.  Goose Wohlt, an engineer and food lover coined the word aquafaba, a Latin term for bean liquid. There is an entire Facebook group, “Vegan Meringue – Hits and Misses!” dedicated to experiments with aquafaba.

Naturally, I was intrigued by the use of this vegetarian egg replacer and tried making mayonnaise with it. I don’t like the real mayonnaise from a jar as I assume, the taste of egg yolks and oil is not my thing. There is a jar in my refrigerator that has oil separating from the mix as it was taken on a trip and got shaken. It is left untouched for a long time as it looks unappetizing. I have to throw it away.

So, I wanted to try this to check its taste and find out if it will occupy a place in my diet. I followed a recipe from  peanutbutterandvegan.com but made some small changes like adding a bit of coconut oil thinking it would help solidify it faster. I learned a few things from my experiment that I will share with you.

Ingredients

  • 1 tbsp apple cider vinegar or white wine vinegar
  • 1/2 tsp ground yellow mustard
  • a pinch of salt
  • 1/4 cup liquid from a can of chickpeas
  • 1/2 cup neutral vegetable oil like corn or canola
  • 1/4 cup coconut oil
  1. Take a glass jar and add vinegar, ground mustard and salt mix well.
  2. Pour chickpea liquid and blend well using an immersion blender.
  3. With the hand-held blender running, pour oil in a thin stream to emulsify.
  4. Finally, add melted coconut oil if you like the taste or use the same vegetable oil in a stream until the mixture is thick.
  5. Use it lavishly on toast or make a sandwich.

Quick tips:

* If you use any neutral oil, it tastes like regular mayonnaise. So use a light tasting, less colored oil. (My coconut oil imparted a strong flavor not familiar with mayo but making it very special.)

* Work with ingredients at room temperature to make the process quicker.

* Pour the oil slowly to make a thick mayo. I used a cup with a spout to pour the oil onto the stem of the blender.

* Low-sodium beans juice is better if salt is not required in the recipe. I used a salty liquid and had to reduce salt in my mayo.

Whipping aquafabaI used a glass jar to make it and store it. Use any narrow long container as there will be a lot of  splashing as it blends. Transfer the mayo to a jar and store in the refrigerator. It will thicken up after a while.

The juice in which you boil beans can also be used in whipping up the miracle egg mix instead of taking it from a can. The idea that the juice of legumes in a can has all the protein and performance of an egg is tantalizing and hard to believe.

Generally, it is the water from white beans and chickpeas that yield the best result because they have a light color and flavor. Other legumes can also be used in some preparations where the color is not a priority.

You can use this mayonnaise, the creamy, versatile condiment on fresh bread or to assemble a burger. Use this instead of mayonnaise in any recipe. This whipped up canned beans liquid can be made into all kinds of amazing dressings and sauces like Ranch dressing, Tartar sauce and Caesar dressing. Adding herbs and spices improve its taste. Use these dressings on salads and pasta dishes.

Tomato on vegan mayoI tried my vegan mayonnaise on toasted brown bread with fresh tomato slices and cucumber. It was stunning!

Vegan mayonnaiseHope you are all geared up to try this! It is really fabulous that the liquid in a bean can has opened up a whole new world of food possibilities for vegans. I wanted to try it in other recipes too, especially in a cake where a lot of eggs are used. Expect that recipe soon!

Posted in comfort food, Dressing, Easy recipe, Gluten free, International recipe, Not just for kids, Vegan | Tagged , , , , , , , , | 28 Comments

Very banana loaf/Banana-y bread

Banana bread is a pleasing way to extend the life of those overripe bananas. This bread is moist and delicious with loads and loads of banana flavor! It is a quick bread so there is no kneading or rising time involved. The color is gorgeous and the taste is delightful. When I want a fruity loaf, I immediately, whip up this banana bread.

If you are new to baking, this is the easiest bread to try. The aspiring cook in you will be very pleased in attempting this bread because it cannot go wrong. This banana bread stands high over many complicated or elegant cakes in taste and texture. It can be a real reward for your effort!

Banana breadI have made a chocolate banana bread earlier, here: Cocoa banana bread. This is a recipe based on it. It takes about 15 minutes to gather the ingredients and an hour to bake. There is no need for a food processor or blender to mix and prepare the batter. Just a whisk or a fork will do the work for you.

I have added whole wheat flour, flax powder and buttermilk to push it to the healthier side. This banana bread is sweeter than the normal banana bread as there is extra banana on top and the flavor shines through. I have added almonds on top to add a nut factor to it. More chopped almonds added to the batter makes it nutty but my son doesn’t like to bite it in his cake. He likes uninterrupted softness. If you are in that club, join me and bake it like this.

Ingredients

  • 1 cup all-purpose flour
  • 1 cup whole wheat flour
  • 1 tsp baking soda
  • 1/2 tsp salt
  • ¾ cup sugar
  • 2 tbsp flax powder
  • 2 bananas mashed + 1/2 banana for the top
  • 1 egg
  • 1/4 cup vegetable oil
  •  ¾ cup buttermilk
  • 2 tsp vanilla extract
  • few almond slivers
  1. Preheat the oven to 350 ° F. Grease and flour a 8″x5″ loaf pan or place a parchment paper inside the pan.
  2. In a mixing bowl, whisk together the dry ingredients (flours, baking soda, baking powder, salt, sugar and flax powder) and set aside.
  3. In another mixing bowl, whisk egg, then add buttermilk, vanilla and oil mixing them well.
  4. Mix in sugar and the mashed bananas.
  5. Combine all the dry ingredients and add to the wet ingredients little at a time to form a batter.
  6. Pour it into the loaf pan and even it.
  7. Top it with banana slices and almond slivers.
  8. Place the pan in the center of the oven to bake.
  9. Bake for 1 hour or until a toothpick inserted in the center comes out clean.
  10. Cool in pan for 5 minutes, then transfer onto a cooling rack.
  11. Slice it and enjoy the soft, banana bread!

banana cakeHow easy it that!  It takes minutes to collect the ingredients available in your kitchen and mix them together. If you want, you can mix the wet ingredients and add all the dry ingredients into it and mix everything in one bowl…so easy!

Mixing the dry ingredients separately helps the leavening agent, baking soda to spread evenly and produce a better result. The reaction starts as soon as baking soda hits the wet ingredients. Bake the bread immediately by having a preheated oven ready.

With sweet breads, you should always stir to combine. Use a gentle touch and be quick. It is better to mix the dry ingredients little at a time until it is moist. Don’t over-do it or else you will get a dry and dense bread. Over mixing will cause large holes as air bubbles escape out while baking and make the bread tough. Air has to be trapped in, to give it a soft and spongy texture.

Banana loafCan you smell it! It is absolutely delicious!

The crack on top happens when crust of this bread starts setting, in the heated oven before the bread finishes its rising. That is quite normal for quick breads. Test for doneness with a tester to see if it comes out without any crumbs. Use a tooth pick in different spots of the bread including the center to check if it is completely baked.

banana bread sliceThe best bananas to use in this recipe are those overripe ones that are half brown. Store your overripe bananas in the freezer instead of throwing them away. They are handy when you think of baking this bread.

You can toss in chopped nuts, raisins or chocolate chips for a crunch and additional taste. Cinnamon, nutmeg, and ginger flavors work well in this bread. Bake this batter in a muffin pan to make banana muffins.

Banana bread keeps well for a week in the refrigerator and for months in the freezer.  I will always come back to this basic banana bread recipe. It gives me greater freedom to add ingredients like nuts and dried fruit and make substitutions. It is a wonderful standard recipe that you can build upon and customize according to taste. This recipe is a keeper and I will return to it when the slightest craving strikes!

Banana bread dessert It tastes like a cake but can be eaten as a breakfast, snack or dessert, as you wish. For breakfast, add a dash of butter and toast it for an added taste. I had it with some chocolate banana ice cream as a dessert. This is the best banana bread I have ever tasted, it is so spongy and banana-y. Enjoy!

Let me share this with you when I party at Fiesta Friday #82 hosted by Angie and co-hosted by Kaila @ GF Life 24/7 and Sarah @ Sarah’s Little Kitchen. Have fun!

Posted in Appetizer, Baked, Bread, Breakfast, Brunch, Cake, Cake decoration, comfort food, Dessert, Easy recipe, Finger food, Fruit recipe, International dishes, Not just for kids, Pack-and-go snack, Side dish, Snack | Tagged , , , , , , , , , , , | 30 Comments

Oreo and blueberry cheesecake

Cheesecake has a special place in my heart and home. It is a hot favorite in any party as it is fancy and tasty. I would never miss a chance to enjoy a slice. If people say, ‘no’, to this cake it could be due to health reasons. Definitely, it is a wonderful, dessert cake!

Oreo crust blueberry cheesecakeUsing blueberries that are in season make it a real summer treat with a beautiful color. I used Oreo cookie crumbs because that is a nice contrast to the creamy cheese layer. You can use graham cracker crust or any cookie crust. I once added some crackers to my cookie crust and that added balance and saltiness. This is surely a summer cake as we can chill it and eat it cold.

CheesecakeYou would have noticed that I like to make my cakes with fewer eggs. Here I have used 1 egg whereas other recipes I referred had included 3-4 eggs. If you like a cheese cake with less eggy this is the one for you. I have done a mini cheesy cupcakes with raspberries earlier here : cheese-cupcakes. I used the same recipe to make this in a 7″ round cake pan with a blueberry glaze.

Ingredients

Crust

  • 1½ cup Oreo cookie crumb
  • 21/2 tbsp butter melted
  • 1 tbsp sugar

Filling

  • 1 ½ cup cream cheese/500 grams
  • 1 egg
  • ½ cup sugar
  • 1 tbsp lemon juice
  • ½ cup sour cream
  • 1 tsp vanilla essence

Blueberry glaze

  • 1 cups blueberries fresh or frozen
  • 1/2 cup sugar
  • 1 cup water
  • 1 tsp lemon juice
  • 2 tbsp cornstarch

Garnish

Blueberries and a sprig of mint

To make the cake

  1. Mix Oreo crumb, sugar and butter.
  2. In a separate bowl combine cream cheese and sugar with an electric mixer until smooth and creamy.
  3. Add egg, lemon juice, vanilla extract, sour cream and beat well.
  4. Preheat oven to 325° F.
  5. Cut parchment paper slightly bigger than the bottom of the pan (see note*) and fit it inside the springform pan.
  6. Spread Oreo cookie crumb mixture inside the pan, pressing it to the bottom and slightly up on the sides.
  7. Pour cheese cake mix on the Oreo layer.
  8. Place the pan on the middle rack and bake for 45-50 minutes.
  9. Bake until a pick inserted into the center comes out with moist crumbs. (Turn off the oven when the center is still jiggly.)
  10. Let it cool on a rack. It firms up on cooling.
  11. Run a butter knife gently around the inside of the pan to release the cake from the sides.
  12. Remove the cake from the pan and put it in the refrigerator for 3 hours or overnight.

To make blueberry glaze

  1. Take blueberries in a pan and add sugar on top and let it cook.
  2. When it boils, mash the berries add water and boil for a few more minutes.
  3. Sieve and collect 1 cup syrup from the mashed berries.
  4. Pour it into another pan and add lime juice, corn flour little by little and mix well.
  5. Cook over medium heat, stirring constantly, until mixture thickens and starts to boil.
  6. Continue to boil for 2 minutes or until mixture is jelly like.
  7. Cool it a little and pour it on the cake and spread it with a spatula.

Note

* Cut the parchment paper by tracing the circle outside the bottom of the pan. Trim the extra paper to avoid it burning. Place this paper on the bottom of the pan so as to remove the cake with ease after baking.

Oreo crustCream cheese mixUse cream cheese that is at room temperature and smooth it with a spoon to get a nice paste. I had some grainy bits in my mix and it was difficult to break it with a beater. It did not affect the taste though!

baked cheesecakeI have read that cheesecakes stick to the sides of the pan. Using a piece of parchment paper around the periphery of the pan would make it easier to remove. But this cake moved away from the side of the pan after it was baked. I am not sure why! The sides turned a golden color…maybe I baked it longer than needed.

blueberry glazeTop the cheesecakes with blueberry glaze when still warm and spread evenly. It hardens on cooling and is difficult to spread.

Blueberry topped cheesecakeDecorate with blueberries and mint leaves. Cool it in a fridge, cut into slices and serve.

CheesecakeThis is a wonderful cake with its silky rich, creamy center and a crumbly bottom crust. It is dense and light at the same time making it a unique cake. You can use frozen berries and make it throughout the year.

Blueberry cheesecakeI was reluctant and afraid of baking cheesecakes earlier…not anymore. Don’t be intimidated…it looks difficult but in reality, it is quite easy.  The only danger with this cake is, you will not be able to stop with one slice. Have a lovely day!

Posted in Baked, Cake, Cake decoration, Cheese, comfort food, Dessert, Fruit recipe, International dishes, Not just for kids | Tagged , , , , , , , | 31 Comments

Hibiscus tea/Health drink

Hibiscus, the tropical flower that blooms in the heat of summer is nature’s amazing gift. I have heard of hibiscus tea and its benefits. Normally, it is made using red hibiscus flowers. There is a pink variety growing in my yard with a crown of vibrant flowers. I am sure the nutrients and quality of all flowers are the same except the pigments. So I decided to make a tea using those flowers.

Hibiscus teaHibiscus tea is made using red flowers called red sorrel or roselle, that are dried. I did not have the patience to wait for my pink flowers to dry completely, so used them after drying for 2 days. I have left some more flowers to dry in my basement for future use.

Ingredients

  • 8-10 dried hibiscus flowers
  • 4 cups boiled water
  • 3 tbsp maple syrup or honey
  • 1 lime to juice
  1. Rinse the dried hibiscus flowers in water.
  2. Take the boiled water in a pot, add the flowers and let it steep for 10 minutes.
  3. Pour the water from the pot into cups.
  4. Stir in maple syrup to sweeten it.
  5. Squeeze lime juice until it changes color.
  6. Add any other flavorings (if desired).

The other ingredients to brighten it would be ginger, mint, lemon juice or orange flower water. I have to try it in different combinations soon.

hibiscus steepedI did not start this experiment with a proper recipe, thinking it would taste good on its own. NO…not exactly! Let me talk about the issues I faced. When I dropped the flowers in hot water and as it was steeping, the tea turned black, to my utter dismay. Maybe, pink flowers are not as good as red…I was confused! I added maple syrup to make it sweet. Still, something was missing. It didn’t have a punch and the color was…blah! Then, I added a few drops of lime juice. Tada…it was like adding phenolphthalein indicator in a chemistry lab while doing titration. The color changed and on adding more juice it turned to a delicate pink. I wanted to run around the town screaming, ‘Eureka’! Instead, I sat down and enjoyed my drink.

Hibiscus flower teaHibiscus tea known as Karkadé, in Arabic, is popular in the Arab world, Northern parts of Africa and Caribbean countries. It lowers blood pressure, stomach irritations, circulatory, excretory and respiratory disorders. Hibiscus tea is rich in vitamin C and treats loss of appetite, boosts energy, combats fatigue and stress. No wonder it was a favorite drink of the pharaohs of Egypt.

healthy teaDrink it hot or after it cools down completely. Add ice to chill it as a summer drink. It tastes good with the maple and lime flavors. A pinch of salt would kick it up a notch. I would definitely call it a refreshing, health tonic.

Posted in Drink, Easy recipe, Raw food, Vegan, Vegetarian | Tagged , , , , , , , | 20 Comments

Sunday funday #12

Actually, Saturday was the funday! I went roaming, taking in the sights and sounds of the big city, Toronto!

I took the subway and went for a Vegan food festival at Fort York and then walked to CNE and on to a long walk on lake shore boulevard.

Vegan food festival was a good opportunity to taste a lot of food. It was interesting to note that a young people were interested in vegan food!

Vegan food festivalVegChoco coconut banana pop. I ate half of it before taking a shot…sorry!chocolate bananaBikes with flowery baskets.bike CN tower between buildingscnCNE, Canadian National Exhibition Place

CneA duck and ducklings are having a peaceful time on a floating tire with all the noise and activities in the background.duckI love graffiti, its artistic magnitude and precision!graffitiIMG_4492Then we went to Mississauga for a weekend music and dance treat.

CelebrationThe day started with a drizzle but developed into the perfect day with enough warmth and cheer to be on the streets.

Posted in Celebration, Photos | Tagged , , , , , , | 5 Comments

Sage olive oil braided bread

I am fascinated by a braided bread because of its beauty. Braiding is something I associate with hair and not so much with food. So this is not just food but an artistic food expression!

Challah is a Jewish braided bread made using eggs. It is normally prepared as a round bread and eaten on Jewish holidays. This is an extended version of it, literally! This sage and olive oil loaf is braided like Challah, but is much smaller.

Braided sage and olive oil breadSage is an easy herb to grow in a small dry area of any garden. It is a great healing herb with a strong fragrance. Ancient cultures burned dried sage as a smudge stick to produce smoke. The smoke was then directed to a person with a feather to bless, cleanse and heal the person being smudged as it has purifying powers. I am totally enticed by the raspy surface, texture and color of sage leaves.

braided sage bread1Braided breadIn addition to whole sage leaves on the braid, this bread is sprinkled with chopped sage, rosemary, garlic and red chilli flakes. It is a fragrant, flavorful, savory bread.

Sage braided breadI was inspired by Martha steward’s braided sage bread : here. I modified the recipe by changing the buttery yeast dough.  I altered the measurement of almost all the ingredient, reduced flour, eggs, added more herbs and spices. The best part is there is no butter in this bread, only extra virgin olive oil. Chilli flakes are added for my heat craving family members. This bread is very interesting to make and bake! So it is my own special recipe which tastes like a European bread that you can buy in a bakery.

Ingredients

  • 2 cups all-purpose flour
  • ½ cup warm water 80-100 ° F + more
  • 2¼tsp active dry yeast
  • ¼ cup extra virgin olive oil + 1 tbsp for brushing
  • 1 egg + some for egg wash
  • 1 tsp white sugar
  • 1 tsp salt
  • ½ tsp dried or fresh rosemary
  • ½ tsp garlic powder
  • a pinch chilli powder (optional)
  • 12 fresh sage leaves
  1. Take a large glass bowl and mix together yeast, warm water and sugar.
  2. Whisk egg in a smaller bowl, add it along with salt and olive oil into the yeast mixture.
  3. Stir in 2 cups flour, crushed rosemary and garlic powder into the bowl.
  4. Knead adding up to 2 tbsp warm water to get a soft non-sticky dough.
  5. Cover with plastic wrap and set in a warm place to rise (about an hour).
  6. When it is doubled in size, punch the dough and add chopped sage and chilli powder and knead.
  7. Divide dough into 3 parts.
  8. Make 3 ropes each 16 inch long with the dough.
  9. Place it on a greased baking tray tucking the ends underneath.
  10. Braid it tucking a sage leaf in between as you braid.
  11. Brush the braided dough with beaten egg wash.
  12. Cover it with a greased plastic wrap and let it rise for 15 minutes or until double in size.
  13. Preheat the oven to 375° F.
  14. Bake for 30 minutes until golden brown.
  15. Remove from oven and brush with olive oil and bake for 10 more minutes or until outer crust sounds hollow when tapped.
  16. Cool on a wire rack and slice after it cools completely.

braided sage breadMaking bread is tricky because the liquid amount varies depending on where you live, the temperature and humidity in the air. When kneading, add flour or warm water as needed to make a soft, sticky dough. If adding water, add a little at a time, until the bread forms a ball. The ball should not be too sticky.

I have braided my hair, folded it in two and tied a ribbon all through my school days. So I thought it is freaking easy, ah… not so soon! It is a bit tricky when the braiding is done on soft, sticky dough. I had to construct and reconstruct to get the braid right. I tucked in fresh sage leaves and pushed their stalks into the dough as I braided.

braided bread coolingWhen this is baking, the aroma makes the kitchen smell like a bakery. Yummmm, I love the smell of fresh bread!!!

sage bread slicesThis bread would be an excellent appetizer with a drizzle of balsamic vinegar. It makes a great breakfast when toasted with a little bit of butter on top.

It tastes good on its own or with grilled vegetables and egg. I have a Kalamata olive pesto that I can put on this bread. Overall an excellent bread, I will definitely make it again. This bread dough would make a delicious pizza crust too.

Posted in Appetizer, Baked, Bread, Breakfast, comfort food, Finger food, International dishes, Main dish, Pack-and-go lunch, Pack-and-go snack, Side dish, Snack | Tagged , , , , , , | 17 Comments