Chocolate rolls When I was young, my dad used to come home for tea and bring a variety of cakes from a bakery near our house. He brings jam rolls often and I have marveled at its softness that melts in my mouth. I cannot count how many times I have smacked my lips and licked my fingers enjoying a swiss roll. (That is how my dentist grew rich, fixing my tooth cavities but allowing me to keep my sweet tooth intact.) 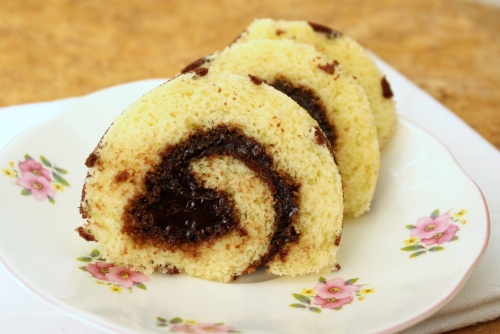 I never tried making sponge cakes before, fearing there is a higher difficulty level to obtain that texture. I imagined the result cannot be achieved in my little kitchen and it may need some industrial baking tools. I had a wish to try it though! When I saw beautiful patterns on jam rolls, making it more appealing, my urge to make it increased. I have been sleeping on this idea for quite some time and suddenly thought, I should give it a shot! What is life if we don’t throw in a little challenge now and then? My interest was renewed when I watched a beautiful video on swiss rolls. I adapted the sponge cake recipe from japanese roll cake/swiss roll, thanking her for the clear, elegant presentation. The result was exactly the way it should be and I was spell bound by the spongy texture. I had to convert all the ingredients into my comfortable cup measurements. And only 2 eggs!…I couldn’t believe it as I have seen recipes with four and six eggs to make sponge cakes. Encouraged by this simple recipe with just 4 ingredients, I set sailing. The design on the underside of the cake was an extra detail I added, being a little crafty! Instead of jam, store bought chocolate frosting is used, so I renamed it as chocolate roll. I am a chocoholic, no doubt! Cake batter for drawing a pattern
- 1 egg white
- 2 tbsp butter
- 3 tbsp sugar
- 3 tbsp flour
- 1 tbsp cocoa powder
- 3 drops of green food colour
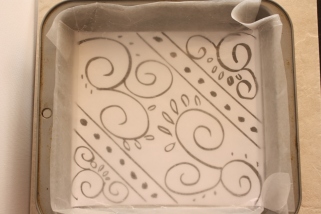
- Draw a patter on a paper and place it in a baking tray. (I used a square tray.)
- Lay parchment paper inside the tray and cut the corner to fit it in.
- Mix butter, sugar, egg white and flour in a bowl.
- Take a small part of it and add green colour or any fancy colour.
- Add cocoa powder to the remaining larger part.
- Fill two piping bags with the colours and pipe pattern slowly on the parchment paper. (I removed the paper to a flat surface so it is easier to move around and trace the design with the coloured cake batter.)
- Put this in the baking tray and allow it to set in a refrigerator so it will not spread when sponge cake batter is added.
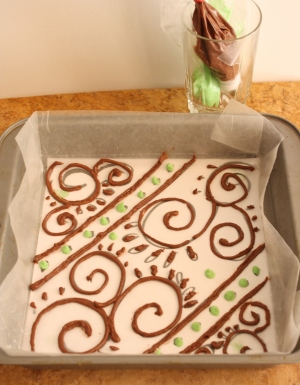 Skipping this part is no big crime! The cake tastes great with or without it!
Ingredients for sponge cake
- 2 eggs
- 1/2 cup sifted sugar powder (icing sugar is fine)
- 1/4 cup cake flour (I used all purpose flour)
- 2 tbsp milk
- Beat the eggs and powdered sugar with a wire whisk.
- Place it on hot water and whisk to dissolve the sugar and warm it slightly. (Remember we don’t want sweet scrambled eggs.)
- Beat the mixture with an electric mixer for 5 minutes on high speed for it to turn fluffy.
- Then beat for 2 minutes on low speed to foam.
- Add sifted cake flour and fold in gently about 10 times with a spatula.
- Fold for about 50 times after adding milk.
- Remove baking tray from refrigerator and pour the batter into it.
- Spread it by tilting the tray to fill the corners.
- Drop tray gently on counter top to release any air bubbles trapped under.
- Bake it in a preheated oven at 350° F for 12 minutes.
- When baked, remove from oven and drop it gently on counter top to prevent shrinking.
- Remove cake holding the parchment paper and cool on a rack.
- When it is warm to touch, invert the cake on another piece of parchment paper.
- Gently pull out parchment paper to reveal the pattern on top.
- Turn the cake to the other side and spread chocolate frosting.
- Roll it and cover it with parchment paper tightly and place it in refrigerator for 30 minutes.
- Take the roll out and slice it into smaller pieces and serve.
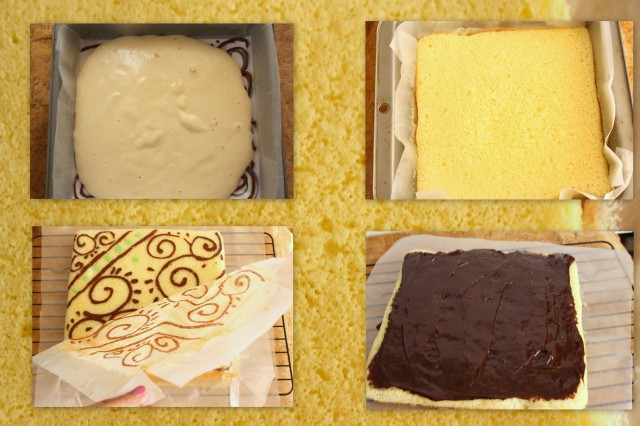
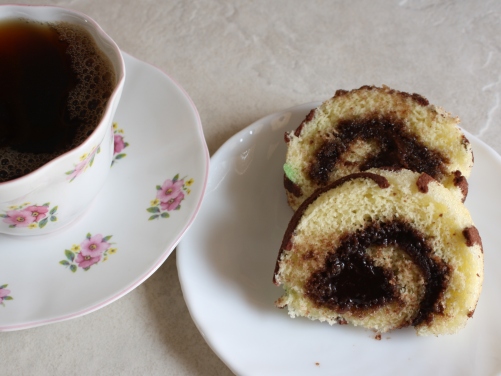
 This roll cracked when rolled as I let it to cool longer, I guess. Have it with a cup of black tea without sugar to balance the taste. That is exactly what I did!



Just lovely! And what a great idea for decorating the outside of the roll!
LikeLike
Thank you for such a quick review! I am still editing a few errors. You are great! I wish I could do the same with your recipes but I am a lazy one getting distracted by a thousand things around. Thank you for all the encouragement!
LikeLike
You are making me drool over those rolls and the designing was a wonderful idea….have made a note, would try this some day for sure…:)
LikeLike
Thank you! Do try it…you will be happy like me!
LikeLike
Roulade is my all time favorite cake and I love the decoration you did.
LikeLike
Here we go…Roulade is another name for this roll…never knew that before. Blogging is very informative! Thank you!
I was in Vancouver last weekend…but was very busy so could not get in touch with you. I will meet with you next time.
LikeLike
Hi dear….planning to make one like this designed one…just a clarification…does the decoration part need to be the batter or can it be buttercream….will it work out…any ideas…?
LikeLike
The decoration part HAS to be cake batter to merge and unite with the rest of the cake. Put the pattern in the refrigerator to firm up before adding the main batter. I think buttercream will melt and mess up the design. It is a simple recipe so have fun. Waiting to see your Roulade! No pressure!!! 🙂
LikeLike
Wow Sridevi! I’ve never seen that method for cakes. Thank you so much for sharing, and following my blog. I will be very happy to follow you as well and look forward to your next creation.
LikeLike
Thank you, Julie! You are always welcome!
LikeLike
You are quite an artist. I think your cake is stunning. You did an amazing job and your idea for decorating the outside of cake baking the decoration into the cake is brilliant.
LikeLiked by 1 person
So the cake doesn’t crack you roll the cake in a clean tea towel while it is warm and let it cool rolled in the towel. When cool you spread the filling and roll again. It works well.
LikeLike
That is a cool idea…will try that next time! Thank you, Suzanne!
LikeLiked by 1 person
Oh this is so beautiful, and the cake looks so perfect light and spongy! My dream at the moment is to make a nice rolled cake, so I think I’ll have a go at this cake recipe sometime!
LikeLike
I was skeptic about making this cake but the Japanese roll cake recipe helped me muster some courage. Try it…you will be amazed too!
LikeLiked by 1 person
I just made it–the cake was fantastic! It rolled beautifully and I really liked the size. The only problem was my filling… I did some sort of meringue-y thing and it was a failure! Haha, so I’ll try again…at least I now have a good cake recipe to use 🙂 Thanks so much for sharing!!
LikeLiked by 1 person
Pingback: Tres leches cake | Coconut craze
How would I convert the measurements to bake this in a 15″x10″ jelly roll pan?
LikeLiked by 1 person
I am not sure about converting the measurements. I assure, it can be doubled for a larger roll. As I mentioned, it was my first trial and I took a pan just eyeballing according to the amount of batter I had.
I guess, 10×15 jelly roll pan works great. You have to fill batter at least 1/2 but never more than 2/3 leaving allowance for it to rise. If the batter isn’t enough you may get a thin sheet. If you double the measurements, maybe you can bake another small cake with the extra batter and make it a Tres leches cake like this:
Hope this helps!
LikeLike
Pingback: lemon dill rolled cake | ten.times.tea
Try this recipe. It won’t crack even after the it’s cooled. Good luck!
http://kitchentigress.blogspot.sg/2014/09/swiss-roll-video-recipe.html
LikeLike